I'm a huge fan of using dictionary pages for anything and everything. At my school, we have a huuuuge collection of dictionaries, and as you can imagine, there isn't a ton of use for them. Rather than watching them sit on the shelves or get recycled, I have spent my year trying to find different uses for them!
One of the first projects I did this year (alllll the way back in September!) were these flowers on dictionary paper. I showed the grade 1 students how to draw a variety of flowers, then they used sharpie on the paper to create a page full of flowers, facing in different directions, some coming off the page, etc. When they were finished drawing, they colored them in using tempera pucks and watercolors. It was perfect for the beginning of the year, because it let me really see where they were artistically. They looked really beautiful all together!
Showing posts with label grade 1. Show all posts
Saturday, June 29, 2013
Monday, June 24, 2013
Trees for Earth Day
This is so late, but I have some more projects to share that are even later!
For Earth Day, my first graders did trees on blooming trees. They used marker to draw the tree, then scraps of old tissue paper and manuals that were going to be recycled to make the leaves. When they were finished, they added in flowers and other details. Very simple to do, and so cute!
Friday, May 10, 2013
Grade 1/2 portraits
These are some adorable portraits that I did with grades 1/2, to give to their mothers for mother's day. Portrait drawing is such a good activity for kids of any age. Kids in grade 1/2 reeealllly need all of the direction possible, as it's often one of the first times they've drawn a portrait of themselves. the only thing I'll change next time is to explicitly show them how to make their portraits smile!
Once they had finished their portraits, they cut them out and glued them onto scrapbook paper. Kids with extra time cut out paper hearts and decorations for their portraits.
I love how these turned out - I think they're absolutely beautiful, and really hope the moms love them!
Once they had finished their portraits, they cut them out and glued them onto scrapbook paper. Kids with extra time cut out paper hearts and decorations for their portraits.
I love how these turned out - I think they're absolutely beautiful, and really hope the moms love them!
Tuesday, March 5, 2013
Dr Seuss Cat in the Hat - grade 1
I can confidently say this is the cutest project I've done with a class so far this year. It blows me away that these are done by first graders. We only have one week until March break, so I wanted to do something that they could complete in 40 minutes. I decided to do a Dr Seuss project, as it was apparently his birthday this week (as someone who primarily teaches 5/6 grade, I had no idea of this, but I've seen some posts lately that reminded me.) I've never actually been a huge fan of Dr Seuss, for no reason other than I wasn't really exposed to him as a child. I do, however, think his artwork is fabulous, and I really loved using his Cat in the Hat character as inspiration for this art.
Students drew right away in Sharpie, then used watercolor paint to add the red. Then, they cut out their drawings, and glued them onto blue paper. So, so simple!
Thursday, February 7, 2013
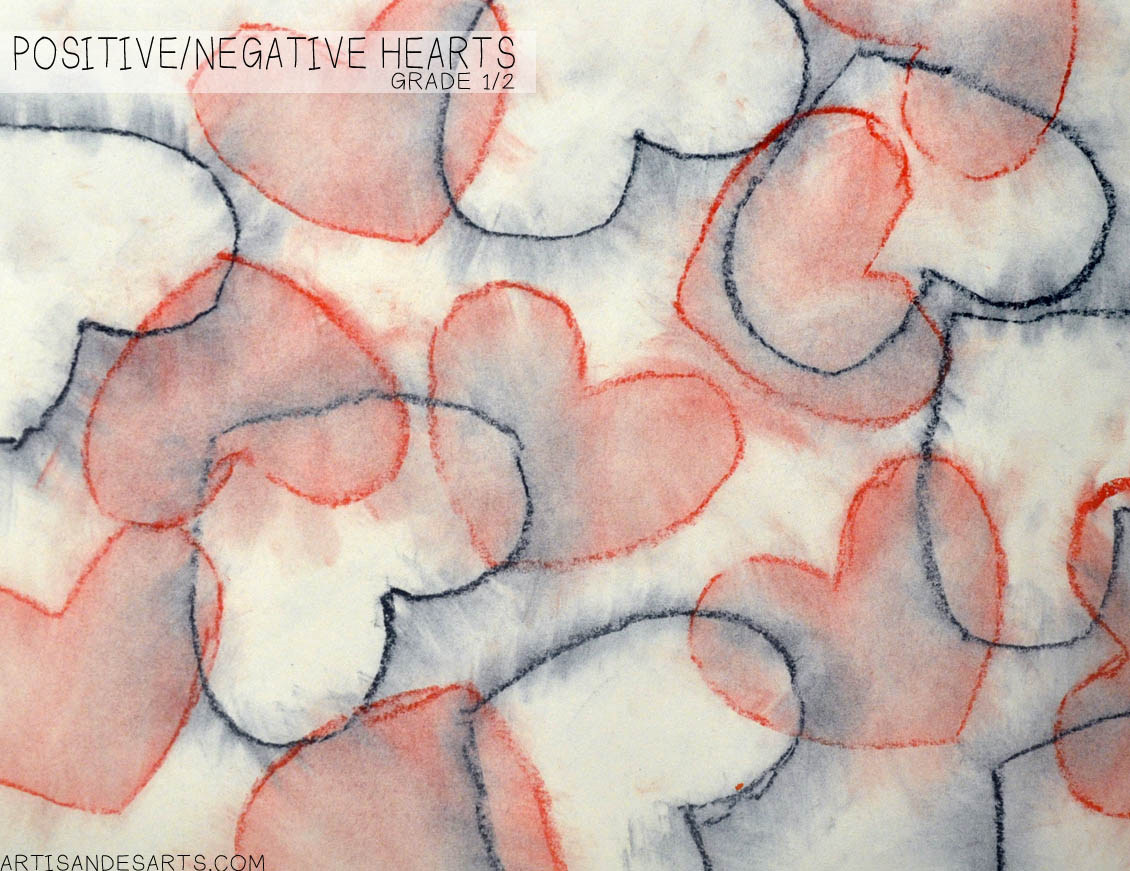
Positive/Negative hearts 1/2
This is an easy, beautiful lesson that I originally saw on artsonia and decided to do with my grade 1/2 classes. I needed something that could be done in only one class, as I won't be seeing some of them again before Valentine's day.
We started off by talking about positive and negative space, and I showed them examples of the hearts that I had cut out (they'll be using these to do the project.) Students were each told that they'd be getting one positive heart shape, and one negative heart shape. This is how they'll use them:
They began by placing the positive heart on the piece of paper, and tracing all around it using chalk pastel. Then, they used a kleenex to pull the color away from the heart, creating a negative imagine of a heart on their page. They did this several times, until they had covered the paper with pastel and white hearts.
Next, they took the negative heart shape, and traced it on the paper, over their other hearts. This time, they pulled the chalk pastel inwards, creating a positive heart shape. They added as many as they wanted to, until they felt their project was finished. They looked beautiful, and were easily finished in one period. Such a great Valentine's project!
Thursday, January 31, 2013
Heart collages - grade 1/2
This is a project that was born out of desperation - we had some incredibly cold mornings last week, and on Wednesday, my usually reliable diesel car decided not to start. I was able to call a colleague for a ride, but didn't end up getting to work until 15 minutes before the bell (much later than I usually arrive!)
When I got to work, I desperately scrambled to find something for my 1st graders to do. I finally decided to slice up some tissue paper and dictionary pages, and have them do heart collages! By the end of the 40 minute period, the collages were so beautiful that I decided to extend the project another week. The next time I saw them, we glued the collages to colored paper, and students used a variety of colored Sharpies and metallic Sharpies to draw lines and shapes in the background.
I'm so happy with how these turned out! They look so beautiful all together.
Some students balled up the tissue, and I love the effect it gave - it almost looks like roses.
When I got to work, I desperately scrambled to find something for my 1st graders to do. I finally decided to slice up some tissue paper and dictionary pages, and have them do heart collages! By the end of the 40 minute period, the collages were so beautiful that I decided to extend the project another week. The next time I saw them, we glued the collages to colored paper, and students used a variety of colored Sharpies and metallic Sharpies to draw lines and shapes in the background.
I'm so happy with how these turned out! They look so beautiful all together.
Some students balled up the tissue, and I love the effect it gave - it almost looks like roses.
Monday, January 7, 2013
Nutcrackers in golden frames - grade 1/2
Here's a cute, simple project I did with grade 1/2, in the two weeks leading up to Christmas. I've always loved nutcrackers - something about their boxy faces and giant teeth that I just can't resist. I used the poster from the Nutcracker movie as inspiration for how to draw these simplified nutcrackers.
Students got to pick a frame from the Melissa and Doug picture frame pad (can't recommend this enough!) then sat down to begin their work. We did a group draw to make the exterior of the nutcrackers - students started with the heads, filling in the eyes, mouth, nose and mustache, then traced straight lines down to the edge of the paper to make the bodies.
When they were finished adding in buttons, lapels, and any other details, they traced their drawing with thin Sharpie. Even though we use Sharpies all the time, the thin Sharpies were a big novelty for them. They were so excited to be using what felt like a pen in art class!
The next time they came to my class, they colored in their nutcrackers using markers. Very cute, very simple project!
Students got to pick a frame from the Melissa and Doug picture frame pad (can't recommend this enough!) then sat down to begin their work. We did a group draw to make the exterior of the nutcrackers - students started with the heads, filling in the eyes, mouth, nose and mustache, then traced straight lines down to the edge of the paper to make the bodies.
When they were finished adding in buttons, lapels, and any other details, they traced their drawing with thin Sharpie. Even though we use Sharpies all the time, the thin Sharpies were a big novelty for them. They were so excited to be using what felt like a pen in art class!
The next time they came to my class, they colored in their nutcrackers using markers. Very cute, very simple project!
Subscribe to:
Posts (Atom)