Ok I am being worse than usual at updating! Summer has just been toooo appealing - we've been working like crazy on the house, and I have been busily getting ready to teach a new grade, in a new division, at a new school!
This is probably my favorite project that we did during my Summer art camp. I actually just came up with it while we were at the park one day, as the kids were playing in the sand, digging and hiding treasure. I asked if they wanted to try drawing treasure maps, and they were all really excited!
To create the maps, I first had my students research antique treasure maps. They looked at a variety of compasses, and decided on the style they wanted. They sectioned out islands, which they outlined using Sharpie, and then colored the edges using pencil to make them stand out more. The next step was details - students used thin Sharpie to add mountains, trees, monsters, pretty much anything they wanted! When everyone was finished, we used brown liquid watercolor to dye the paper brown. The next day, my camp volunteers helped to burn the edges of the paper, giving them an aged look.
They were soo proud of these, and I don't blame them - I LOVE them!!
This last one was done by a student of mine that is just such a talented artist. She had to leave before we got around to burning the edges, but the finished product is still beautiful. I'd hang this on my wall!
Tomorrow is my first day at my new school - wish me luck!!
Showing posts with label art camp. Show all posts
Monday, September 2, 2013
Thursday, July 18, 2013
Art camp - Sharpie doodle art!
Here's another quick update from the world of art camp. I am three weeks in and it's going so well! Only six days left.
There's an artist I really love, over at ihopethismakesyouhappy.com, who does incredible Sharpie paint drawings (see some here.) I just love them, and thought they would make excellent inspiration for an art camp project!
We do this project on Friday mornings, as it's really simple, calming, and takes up a good chunk of the morning. Kids are always really happy with the results!
To get them looking their best, I have students research the original artist, and talk about what makes his artwork so appealing (the variety in shapes, the thick black contrasted against color, etc.) Then, they divide their paper into shapes, and color them in using a pallet of 5-6 colors. After that, they use a combination of thick and thin Sharpies to make their doodles. Beauty!
You really should check out this artist's work. I have no clue who he is, but his style is awesome and there's so much to inspire art projects!
There's an artist I really love, over at ihopethismakesyouhappy.com, who does incredible Sharpie paint drawings (see some here.) I just love them, and thought they would make excellent inspiration for an art camp project!
We do this project on Friday mornings, as it's really simple, calming, and takes up a good chunk of the morning. Kids are always really happy with the results!
To get them looking their best, I have students research the original artist, and talk about what makes his artwork so appealing (the variety in shapes, the thick black contrasted against color, etc.) Then, they divide their paper into shapes, and color them in using a pallet of 5-6 colors. After that, they use a combination of thick and thin Sharpies to make their doodles. Beauty!
You really should check out this artist's work. I have no clue who he is, but his style is awesome and there's so much to inspire art projects!
Thursday, July 11, 2013
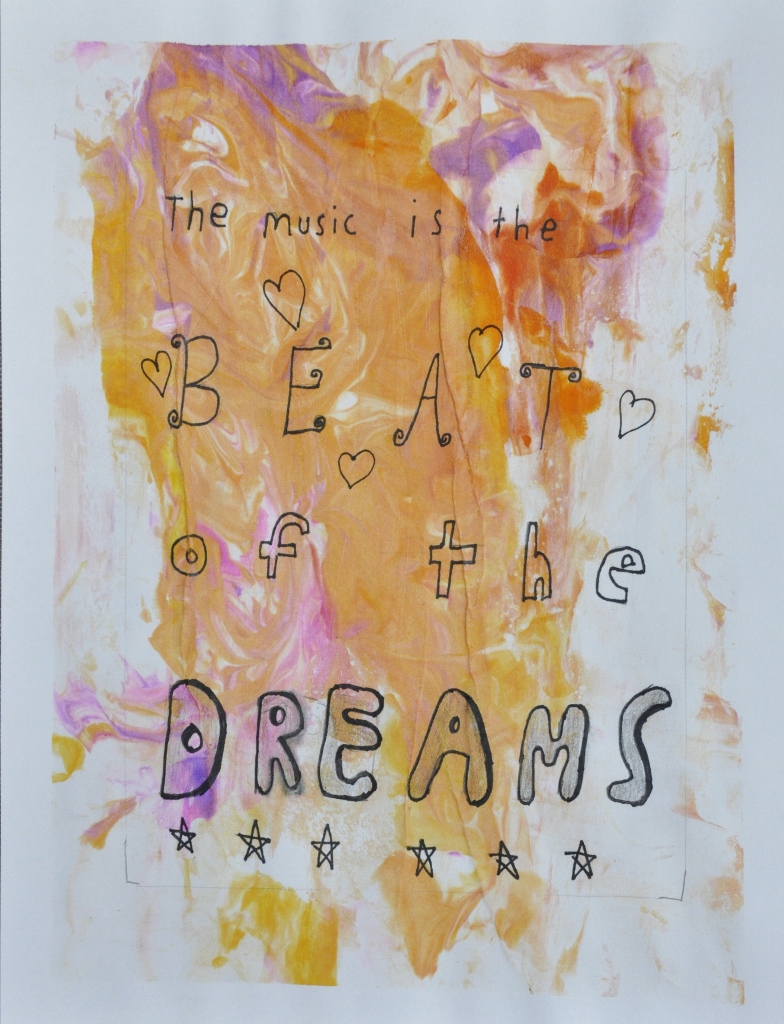
Another art camp goodie - hand lettered quotes!
Hand lettering is one of my favorite things to do. As someone that can't really draw, it's always been something that I am able to fine tune and feel a moderate amount of success with. I decided to try a hand lettering project with students for the first time today, and I will definitely be doing it again!
The first thing we did was look at hand lettered quotes on google. We studied them, and talked about the features (most of them are written into a square shape, and feature different styles of text for teach line.) We also talked about how certain words were larger, implying that they're a more important part of the quote.
Campers then chose their own quotes, and did a rough draft into a square shape. When they were confident with their writing, they lightly traced the squares onto good paper, and copied down their quote. Using a fine Sharpie, they hand lettered using a variety of styles of writing.
The last magic part of the equation was hand dying the paper using the ol' shaving cream and liquid watercolor technique (do you know this one? If not, I will post a tutorial.) Since we had taped the papers down to our placemats using painters tape, the shaving cream went around the tape, leaving a beautiful crisp, white border when they were done. Many kids voted this their favorite project so far!
The first thing we did was look at hand lettered quotes on google. We studied them, and talked about the features (most of them are written into a square shape, and feature different styles of text for teach line.) We also talked about how certain words were larger, implying that they're a more important part of the quote.
Campers then chose their own quotes, and did a rough draft into a square shape. When they were confident with their writing, they lightly traced the squares onto good paper, and copied down their quote. Using a fine Sharpie, they hand lettered using a variety of styles of writing.
The last magic part of the equation was hand dying the paper using the ol' shaving cream and liquid watercolor technique (do you know this one? If not, I will post a tutorial.) Since we had taped the papers down to our placemats using painters tape, the shaving cream went around the tape, leaving a beautiful crisp, white border when they were done. Many kids voted this their favorite project so far!
Tuesday, July 9, 2013
1 point perspective optical illusion on collage background
Well it's sure been a long time since I've updated - this is mostly due to the fact that my summer camp is in full swing, so I just haven't had time to get on the computer! Days are spent 100% with the kids (no lunch or recesses by myself anymore!) and after camp is when I plan, prep, and rest! Camp has been running for a week and 2 days, and so far, I'm having a wonderful time. It's been all I was hoping for. I can't wait to write more about it, but for today, I am just dying to share a project!
This is the first project I do for the week with my camp groups. The week one projects were just as fantastic, but my camera was dead so I missed getting photos. I found the idea here, and even though it was done by high school students, I knew it would adapt well for my art camp kids (grades 3-8!)
Students started by making a collage with the "color story" of their choice onto a piece of foam core. It's really interesting to watch them choose colors - some have trouble going off the grid, but I try to keep reminding them that it's a color story, it doesn't have to be ALL one color (so if they chose orange, they can use yellows and reds - but in the end, the overall message should be orange.)
The next day, they do basic one point perspective drawings using a variety of shapes, onto a separate paper. The shapes are colored in with gold Sharpie, and the lines are colored in using colors that match their color story.
I think they're just beeeauuutiful!!
This is the first project I do for the week with my camp groups. The week one projects were just as fantastic, but my camera was dead so I missed getting photos. I found the idea here, and even though it was done by high school students, I knew it would adapt well for my art camp kids (grades 3-8!)
Students started by making a collage with the "color story" of their choice onto a piece of foam core. It's really interesting to watch them choose colors - some have trouble going off the grid, but I try to keep reminding them that it's a color story, it doesn't have to be ALL one color (so if they chose orange, they can use yellows and reds - but in the end, the overall message should be orange.)
The next day, they do basic one point perspective drawings using a variety of shapes, onto a separate paper. The shapes are colored in with gold Sharpie, and the lines are colored in using colors that match their color story.
I think they're just beeeauuutiful!!
Subscribe to:
Posts (Atom)