Showing posts with label diy. Show all posts
Friday, February 14, 2014
Simple bathroom makeover - for around $100!
Our main floor bathroom was a hideous disaster that I'm surprised we tolerated for as long as we did.We went a good 7 or 8 months living with the "before" bathroom, which I actively hated, before I took this renovation on in the summer. Had I known the makeover would have been so simple and inexpensive, I would have done it the week we moved in.
The previous owners had the bathroom decorated like this, and I would actually argue it was better than what we did when we first moved in. At least their shower curtain had a bit of life in it.
We moved in, used an old shower curtain from who knows when, changed out the toilet seat. and called it a day. But, like I said, months of seeing that dank, dark bathroom finally got to me, and for only about a hundred dollars, we were able to transform the bathroom into a much more beautiful space!
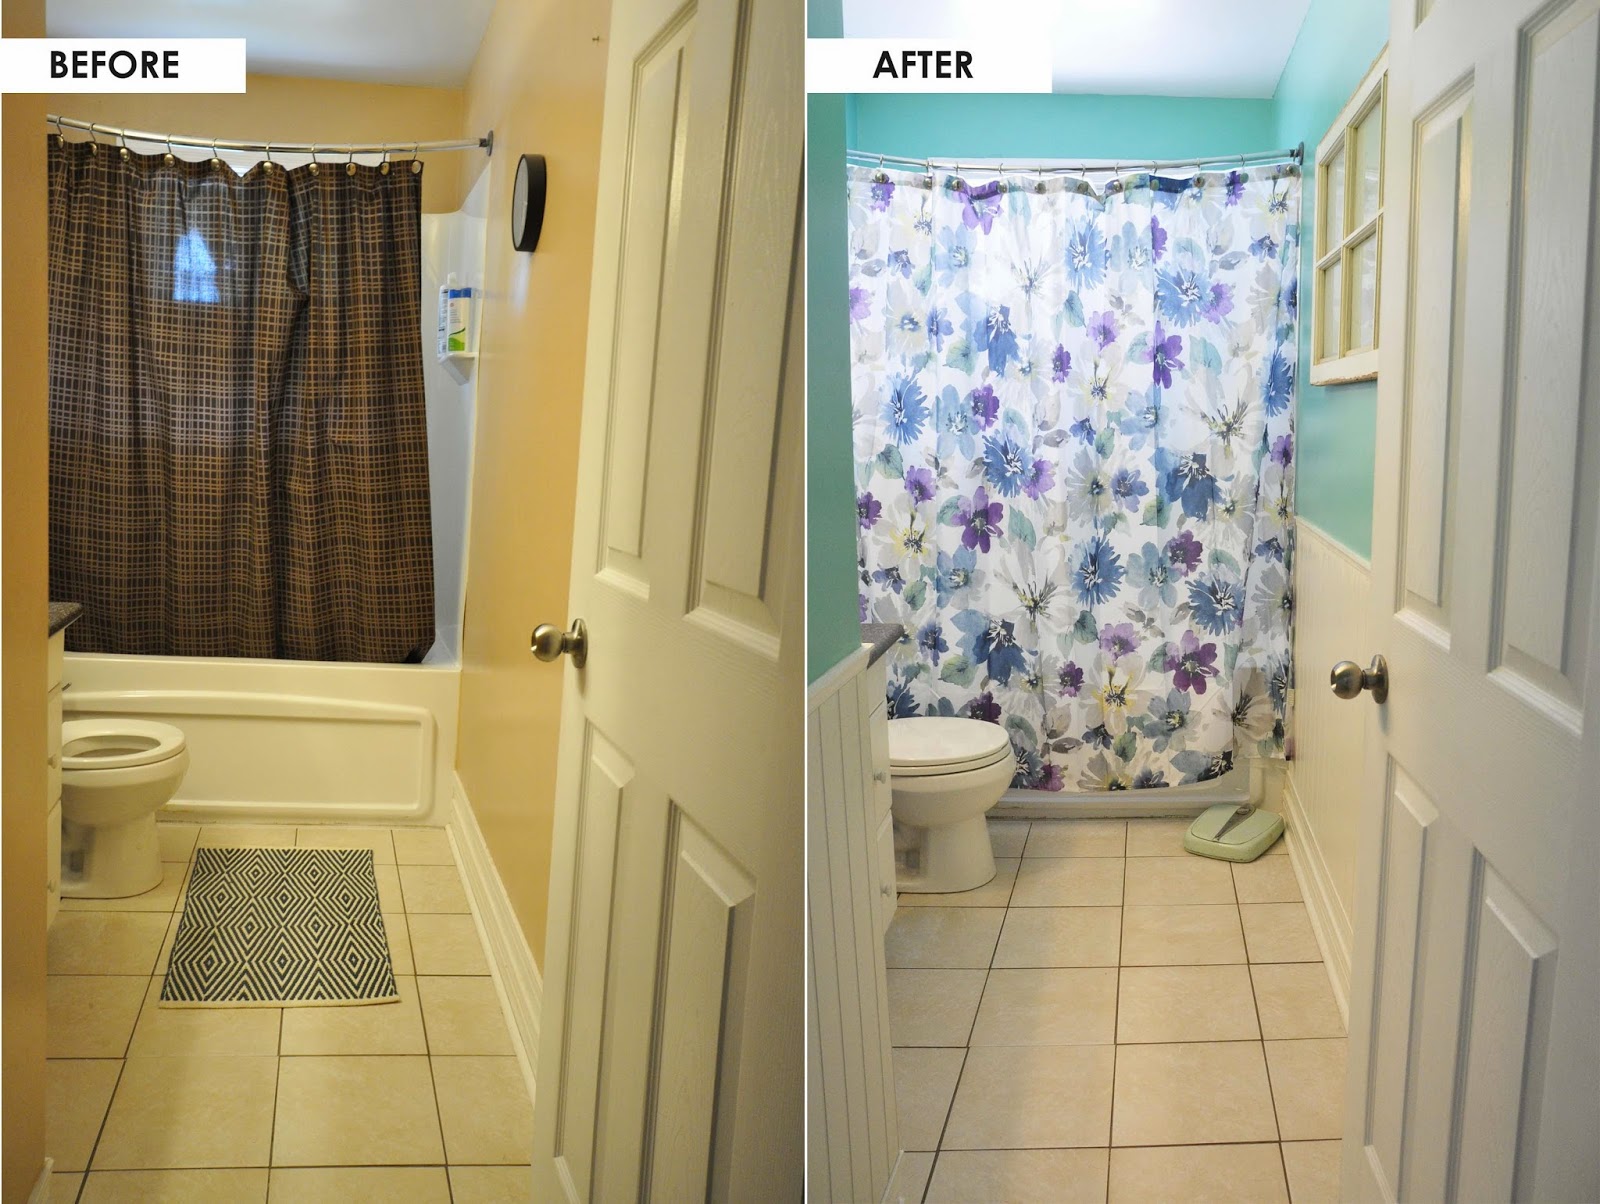
The first thing I did in the bathroom was repaint. A while back I scored an amazing deal on paint (25 cans for a buck a piece, that I could come back and retint whenever I wanted) so I brought in two cans and got one tinted in a nice teal color, and a second one tinted in an antique white (to paint the wainscoting.)It took a couple of coats to cover that awful beige, but I was so happy to see it gone.
The wainscoting made the biggest difference in the room. Since the bathroom isn't very big, it cost really little to do. I can't find the exact product we used online, but at Lowe's, we found a big sheet of wainscoting that, when cut in half, gave us the perfect height for what we wanted in the bathroom. Each sheet cost $35, and two sheets was enough to do the entire bathroom. In the interest of keeping it really easy, I had the sheets cut in half at Lowe's, so that we would only have to do minor cuts to fit it in the bathroom.
The installation was super simple, and I ended up doing most of it myself. I placed it over the previously existing baseboards (which were double height for some reason, but I actually really like the way it looks.) I used a nail gun to put the pieces in place, and then topped them off with a piece of chair rail. I then painted the entire bottom portion in the antique white color (baseboards included.)
The last thing I had to do was find the perfect shower curtain, and find a few decorations to spruce things up. It actually took a couple of months for me to find a shower curtain, but I finally came across one at Home Outfitters for about $20 (it was on sale half price) that fit the room perfectly.
Joel's parents had a great old scale they were getting rid of that they gave to me, which matched the walls really well. The old window I got for $5 at a garage sale a few years ago, and I've just been waiting for a spot to put it (it used to be hung here in our kitchen, but we since put in a real window!)
There are many things I'd do if money weren't an issue - I'd love to change the flooring (can you believe that's actually the color of the grout? It's not just dirty!) to something much darker. Maybe a dark, wood look ceramic tile.
If I had the money, I'd also change the vanity to something much cuter - probably to something simple and modern, still white cabinets with a darker counter top. And while I'm dreaming, I would throw in a claw foot tub instead of the standard builder tub that's there right now. But for now, I'm content to live with our inexpensively made over bathroom!
Sunday, January 19, 2014
Our Nursery (about 90% finished!)
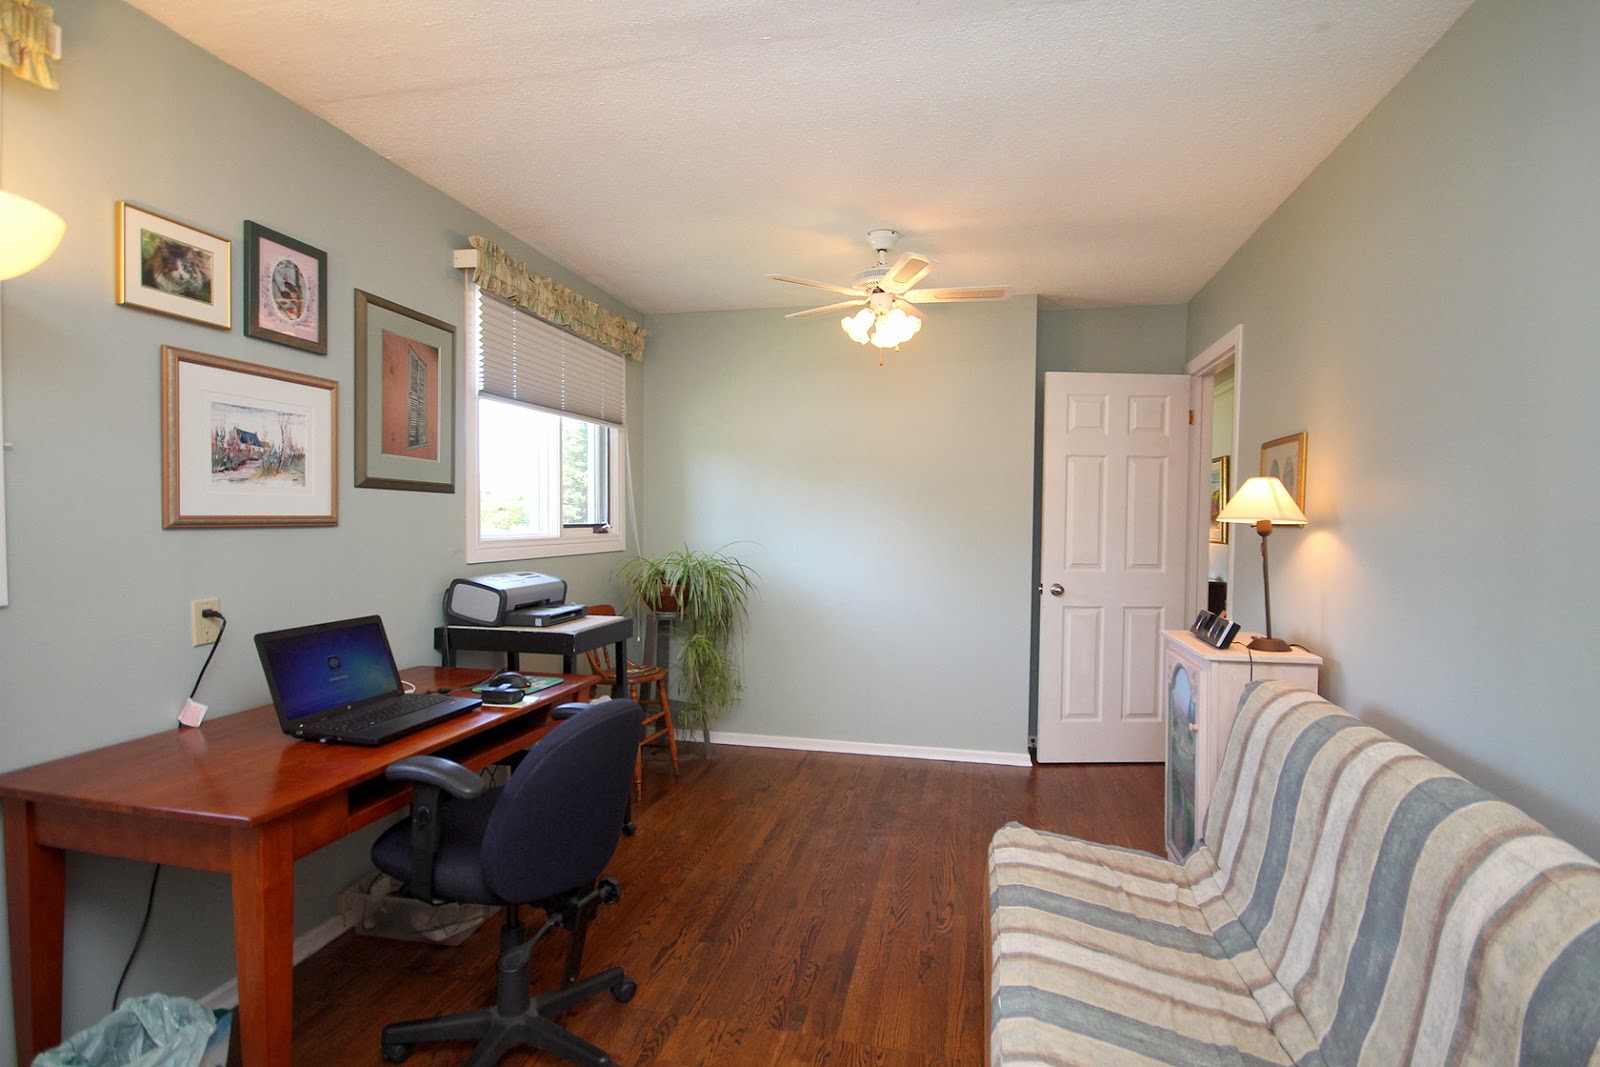
It's a bit hard to show true before and afters, because the room is so different, and angles that existed in the room before don't exist anymore. For an idea of what the room looked like when we moved in, here is what we began with:
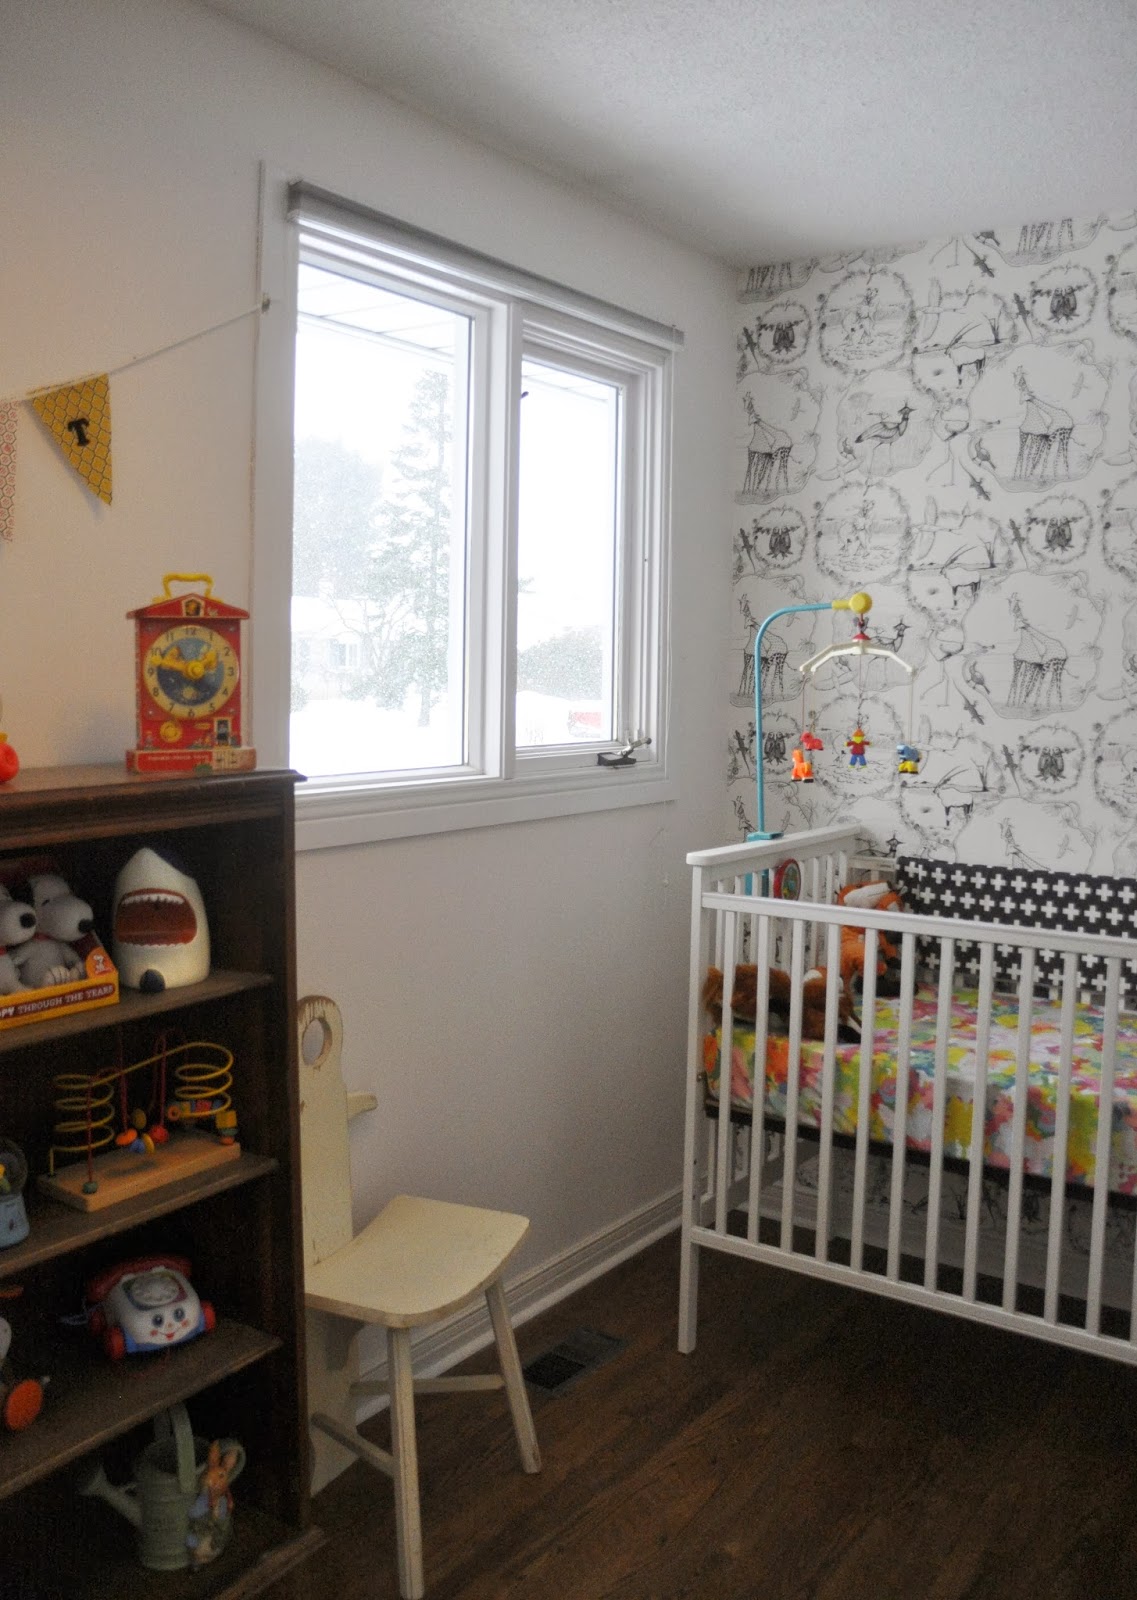
and this is it from today, from roughly the same angle:
The room is shorter now, and the closets are gone, space which we used to make our mudroom/laundry room. My husband also added in a little hallway on the left side, and added a door to the hallway.
This was standing from near the entryway - it was a really large room. When the house was built, it was originally two bedrooms, which is why it has two ceiling fans, two windows, etc.
Today, it looks like this - it's much narrower, about 2-3 feet was cut off for the hallway on the left side of the wall, but beyond this, it opens up into the full sized room (this is sort of a "nook" area now.)
From the far end of the room (near the closets) the room before looked like this:
And now, it's our wallpaper wall!
So with that all out of the way, here's a full tour of our nursery!
This is the view from the doorway, when you first enter the room:
My husband made the honeycomb lights, which is actually one of my favorite parts of the entire room. He just sort of brainstormed them one night, and a few days later, we had this beautifully constructed honeycomb light in the room. He took some pictures while he worked and put together a little tutorial, which I'll post soon hopefully!
To the left when you enter is our clothing hanger. We made this using an old branch we found after a windstorm. We have all of our outfits hanging from 0-6 months, which is more than enough.
In our little nook is my change station. This beautiful mid-century modern dresser was given to me by my mother in law. It's just so perfect!
The horizontal paneling is an idea we found on Vintage Revivals. It only cost us about 20 dollars for the materials to do it!
Then we have our toy shelf, then back to the crib!
One of the things I'm most proud of in the room, and which took me longer than anything else, was the quilt I made for our girl. It's the first quilt I've ever made, and while it's not perfect (not even close!) I am so so happy that I got it finished before she comes.
On the topic of quilts, my best friend made me an incredible quilt which she gave to me at my baby shower. I just love it so much!
We are so in love with the room. It's not completely finished, but it's very, very close. The only things left on the agenda are:
- Installing lights on the wallpaper wall
- Putting up artwork (we have about 7 frames with photos, waiting to go up!)
- Some kind of window treatment
Thursday, October 31, 2013
This years Halloween costume!
I am pretty pleased with my Halloween costume this year, and now that my students have all seen it, I can share it with the blog world!
This year, I decided to go as a wacky waving inflatable arm flailing tube man (those tubes you see in parking lots of car dealerships and grand openings.) I saw this gif way back in June, and knew I had to try and recreate it for Halloween. I didn't really know that I would be 6 months pregnant by the time Halloween rolled around, but it was still do-able!
Here's a video of me in my costume from last night:
There were no instructions to be found online, so I just kind of guessed about how to do it. It was a lot of work to make, but I've always been willing to do the work for a good costume (see Lego Man!)
The materials I used for this costume were:
This year, I decided to go as a wacky waving inflatable arm flailing tube man (those tubes you see in parking lots of car dealerships and grand openings.) I saw this gif way back in June, and knew I had to try and recreate it for Halloween. I didn't really know that I would be 6 months pregnant by the time Halloween rolled around, but it was still do-able!
Here's a video of me in my costume from last night:
There were no instructions to be found online, so I just kind of guessed about how to do it. It was a lot of work to make, but I've always been willing to do the work for a good costume (see Lego Man!)
The materials I used for this costume were:
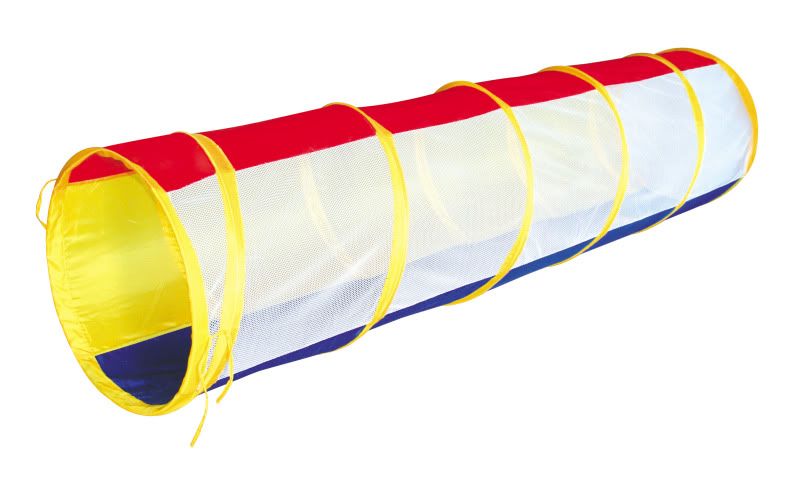
- One of those tubes kids use in the backyard (tent tube?)
- 2 meters of stretchy jersey fabric (yellow)
- black and white felt (eyes)
- black nylons (mouth)
- two pieces of velcro (to velcro the mouth closed)
To start, I sewed a long yellow tube which I fit over the tent tube. Instead of stitching it up at the top, I just tied it in a knot from the inside, which sealed it perfectly. Then, I cut holes where my arms would naturally fit, and sewed two long skinny tubes on as arm holes (I made them much, much longer than my real arms - about three times the length!)
For the eyes, I just sewed directly onto the tube where it seemed right (I had my husband help from the outside to pick the right spot.)
I cut out the mouth shape and sewed it right onto the tube, then cut a straight line at the top of the mouth from the inside. Out of this slit, I can see a bit and also poke my head out. I attached two pieces of velcro so that I can keep the mouth opening closed.
It's such a great costume. It's crazy impractical (I can only handle about 15 minutes at at time before I need a break) but it makes me laugh so much that it's totally worth the irritation of taking it off and putting it on all day. At the end of the day, my students laughed a lot, which is basically always my goal.
Tuesday, October 1, 2013
Record cabinet DIY - turning a record cabinet into a toy chest!
This project is exciting for a few reasons. For starts, I have always loved the look of old record cabinets, but never had any need for one in my house. We already have a record player to begin with, and even if we didn't, I find them really huge and bulky for something that wouldn't be used too often. So I am very excited to have finally come up with a way to use one of these old things!
The second reason this project is exciting is that it finally gives me an excuse to announce that... I'm pregnant! My husband and I are expecting our first child, a girl, in February.
So, how does that relate to an old record player?
Well a few weeks ago, I spotted this monstrosity on it's way to the trash.
The second reason this project is exciting is that it finally gives me an excuse to announce that... I'm pregnant! My husband and I are expecting our first child, a girl, in February.
So, how does that relate to an old record player?
Well a few weeks ago, I spotted this monstrosity on it's way to the trash.
I somehow managed to convince my husband that we needed to
save it, so a few hours later, we loaded it into our truck and took it home.
Since I have babies on the brain lately, I knew that I
wanted to use it as a piece in our nursery. I hemmed and hawed over a few
different uses, and finally decided that it would make a perfect toy chest
(which for the first while, could just be storage for the huge amount of baby
supplies that will soon overtake our lives.)
We began by prying the record player apart, and emptying out the insides.
(You'll have to excuse my husbands arms here.. he doesn't seem to comprehend the idea of taking photos for a blog post when there's work that can be done.)
This part was surprisingly straight forward. Even though the cabinet was full to the brim with cables, wires, and electronics (a tape deck, record player, radio) it was basically as simple as just unscrewing things and pulling them out.
Once this was done, I brought the cabinet outside, and primed it with a stain blocking primer.
In hindsight.. a second coat would not have been a bad idea. But, I left it at one (this just meant I needed several coats of my paint instead.)
After it dried overnight, I came at it with a nice buttercream yellow. I haven't thought of a real "color story" for the nursery yet. All I know is that I want a mix of furniture colors/textures, including wood and paint. So, I just went to the paint store and chose what spoke to me, not worrying about the other pieces to come.
Those mickey mouse holes where the speakers used to be just needed to be covered up with some fabric. I had some leftover floral, which went pretty nicely with the yellow, so I just used a staple gun to throw that on. I spray painted the grates white, then painted the rest of the piece yellow (many, many times.)
And at that.. the exterior is done!
Here's a few comparison shots:
And some more of the exterior:
Once we bring it inside, I'll get some better brighter photos (for now, the nursery is missing some walls. We're putting a laundry room in next to it!) I also have to consider how to arrange the inside - shelves or compartments, or just open as it is now.
Has anyone else come up with a use for one of these old record cabinets?
Sunday, May 12, 2013
What you can make with 2,000 sewing pins and a lot of patience
This is a project I did a few months ago. The only reason I haven't shared it yet is because its so difficult to photograph! All of the little pins cast shadows when I take the pictures, so I'll never be able to get a totally accurate-to-real-life photo. But at any rate - here's what you can make if you too have thousands of sewing pins and a lot of patience!
Here's a simple breakdown of the process - pretty self explanatory. I pinned the letters onto a foamy poster board, which I painted first using acrylic paint. Then, I printed out my lettering and cut it out, the pinned all around it.
Very time consuming, but easy to do in front of a TV. All in all, it took me probably about 10-12 hours to complete. It's crazy how much patience I can have for certain projects, while having so little patience for other things!
I should mention that I saw the idea for this online about a year ago, and can't locate the original.. it was executed differently and had different text, but was the same basic idea. If you have seen it, feel free to link me to it so I can source it!
Here's a simple breakdown of the process - pretty self explanatory. I pinned the letters onto a foamy poster board, which I painted first using acrylic paint. Then, I printed out my lettering and cut it out, the pinned all around it.
Very time consuming, but easy to do in front of a TV. All in all, it took me probably about 10-12 hours to complete. It's crazy how much patience I can have for certain projects, while having so little patience for other things!
I should mention that I saw the idea for this online about a year ago, and can't locate the original.. it was executed differently and had different text, but was the same basic idea. If you have seen it, feel free to link me to it so I can source it!
Monday, April 22, 2013
The big kitchen reveal - Our $2300 entire kitchen renovation!
I am so, so excited to share with everyone our kitchen reveal!I have been posting for weeks about the little updates that we have been doing since we moved in, but we are now finally at the point where everything in the kitchen is finished (for the most part - there will always be little updates!)
I'll start with a few before and afters, as I love to see the difference! My favorite parts - the floors, and the white cabinets (previously cream and black..ugh!)
This is my favorite view in the whole room, the view I get every time I walk into the kitchen from the main hallway. It's where I see the most of my floors, plus our beloved picnic dining table (passed down to me by my parents - my dad even had it shipped here from cross country from Edmonton!)
You also get a great view of the light fixture Joel made using reclaimed wood and mason jars.
Here's what we see when entering the kitchen from the living room. This is around where the picnic table is:
Here's the floating shelves that we made. They've held up really well so far, and are so much more convenient than closed shelves!
I am so happy to be finished our kitchen. This was a long project. We worked for months on almost all aspects of our kitchen, including:
I'm really proud of us for doing this all for $2300. With the amount of things we want to do in our house, it just isn't reasonable for us to spend a lot of money on renos. Doing our kitchen so cheaply meant we had to work slowly, using what we had, or waiting for sales (or kijiji deals.) Things like buying flooring took us weeks, as we scoured for deals and worked out every possible way for them to be the least expensive possible. But in the end, the patience was so worth it!
And now, we are on to the next projects! Joel's busy working on a huge, beautiful new lighting project for our TV room. He came up with this one all by himself, and I am so excited to see it finished! I'll make sure to post pictures when he's done.
Have a great week!
I'll start with a few before and afters, as I love to see the difference! My favorite parts - the floors, and the white cabinets (previously cream and black..ugh!)
This is my favorite view in the whole room, the view I get every time I walk into the kitchen from the main hallway. It's where I see the most of my floors, plus our beloved picnic dining table (passed down to me by my parents - my dad even had it shipped here from cross country from Edmonton!)
You also get a great view of the light fixture Joel made using reclaimed wood and mason jars.
Isn't that little ladder cute? My neighbor was throwing it out last week and I grabbed it! I want to find something to put on top of it, but can't decide what, yet.
Here's a better view of the floors. I still can't get over them! I'm so relieved that Joel loves them as much as he does, because I sort of dumped the idea of doing herringbone floors on him, and they ended up being a LOT of work.

Here's what we see when entering the kitchen from the living room. This is around where the picnic table is:
Here's the floating shelves that we made. They've held up really well so far, and are so much more convenient than closed shelves!
And finally, one more shot of the sink area. The apron front sink has been one of the best changes that we've made in the kitchen. It's huge and lovely and it cleans up so easily.
- building wood counters from doors ($100)
- installing an apron front sink ($250 on kijiji)
- changing our cabinet orientation (free!)
- painting the cabinets ($150)
- installing new hardware ($70)
- building floating shelves (sponsored by Lowe's)
- ripping up our ceramic floors (free, but annoying!)
- installing hexagonal backsplash (about $150 including tiles, grout, and tile nipper tool)
- installing herringbone hardwood floors part 1, part 2, part 3 coming soon! ($750 for the flooring from Seaway Cabinets and Flooring, plus another $400 or so in equipment rental, stain, verathane, and other random expenses, for a total of $1150)
I'm really proud of us for doing this all for $2300. With the amount of things we want to do in our house, it just isn't reasonable for us to spend a lot of money on renos. Doing our kitchen so cheaply meant we had to work slowly, using what we had, or waiting for sales (or kijiji deals.) Things like buying flooring took us weeks, as we scoured for deals and worked out every possible way for them to be the least expensive possible. But in the end, the patience was so worth it!
And now, we are on to the next projects! Joel's busy working on a huge, beautiful new lighting project for our TV room. He came up with this one all by himself, and I am so excited to see it finished! I'll make sure to post pictures when he's done.
Have a great week!
Subscribe to:
Posts (Atom)


.jpg)