Showing posts with label paper. Show all posts

Friday, November 25, 2011

Onomatopoeia art


It's been a while since I've posted a project - it always seems to be that I'll have a couple of weeks where we are "in process", then suddenly I'll have several finished projects to share (such as I do now.)

Inspired by a picture I saw on pinterest, I decided to do a lesson on onomatopoeias with my grade 5 and 6 art classes.

We started by talking about what onomatopoeia are, then we spend some time looking at some comic books, and some artwork by Litchenstein, Next, I showed the class a short video from the original Batman movie, and had them call out the onomatopoeias that flashed on the screen.

I had tracers available for students if they weren’t confident doing the lettering, but others just went off on their own and they all turned out so great.

 
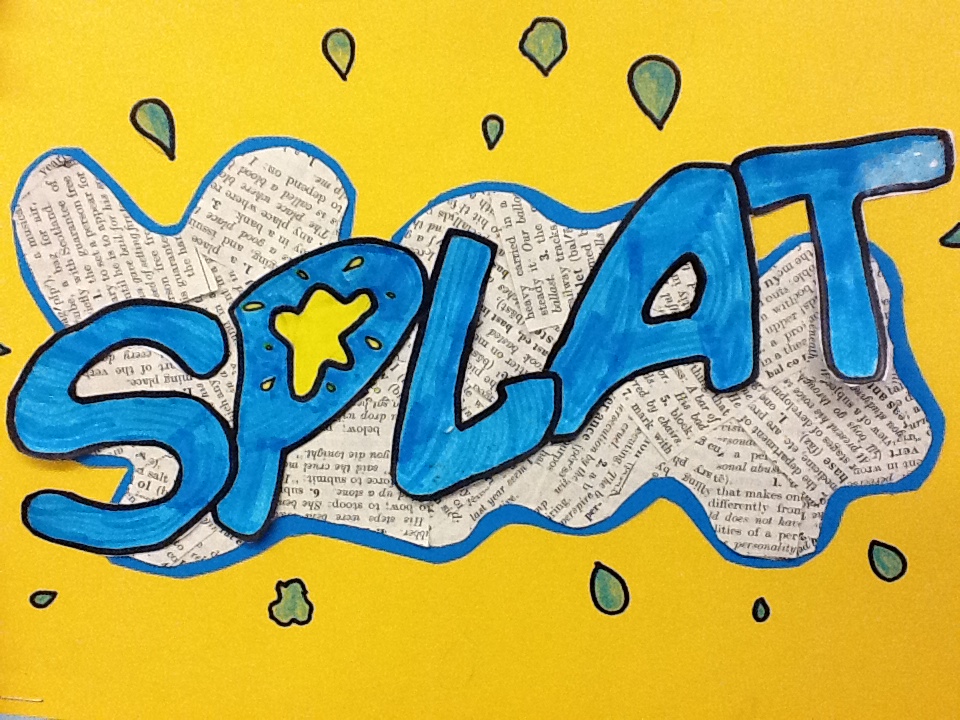
When they were done the lettering, they coloured it in (using ONE color, unless they could make a VERY special case as to why they needed more) then cut it out carefully.


The next step was to collage an entire sheet of paper using old dictionary pages. Next, they traced a shape, such as an explosion or a cloud, on the back, and cut it out. After gluing their shape onto a new sheet of coloured paper, they cut it out, leaving a border. Then they glued THAT onto ANOTHER sheet of paper, then glued their word on top.


Look at how great they look!


This is a project that used a TON of paper, and there were scraps everywhere, but the results were so great that it was definitely worth it!
This took two 1 hour periods.

Friday, September 30, 2011

Urban/rural bird collages

Today I did my first ever collage with a grade 2/3 class. I found an idea similar to this somewhere online, but I can't find the original source so I don't know how I can credit it! If anyone ever stumbles upon it, please let me know.

My plan was to make these collages (I figured it goes with urban and rural studies, which they will be doing soon enough)

I started by cutting out pages from an old atlas (Notice I did my example on the Union of Soviet Socialist Republics.)
 Kids had to cut out the white border, and glue it onto the black papers (pre-cut by my grade 6's).
 Then they used black cardstock to cut out the power lines.
 Then they used "pretty paper" (aka scrapbooking paper) to cut out grass and flowers. Finally they added some birds to the top of the power lines, and our first ever collage was done!


I find when I look at these, I imagine that the birds traveled to wherever their map says. This took a full 1 hour period to complete, but was nice because students didn't need to bring more than glue and scissors. A nice, successful, EASY Friday afternoon!

Thursday, September 22, 2011

Optical illusion - Hands

Using an idea I found here, I had the kids make optical illusions using only their hands, a pencil, and a Sharpie.
Students were instructed to trace their hand, very faintly, in pencil. Then, they would draw horizontal lines across the paper, raising the line slightly when they crossed over the hand, creating an arc. 
 Some kids started from the bottom, others went from the middle. I personally think the middle gives better results - I'm not entirely sure why, but it just seems to.
We noticed that the more lines you put, the more obvious the illusion becomes. If students take the time to do this slowly, it really shows the illusion!
 A few students even acted as test subjects, and tried in different colors. Although any color works, I still love a nice, sharp, black the best, and I would encourage future classes to stick with black.

 The one above looks like the hand is floating away in the wind. Love that effect!
Loved it! Definitely what I needed today.

Related Posts Plugin for WordPress, Blogger...