Showing posts with label collage. Show all posts

Tuesday, July 9, 2013

1 point perspective optical illusion on collage background

Well it's sure been a long time since I've updated - this is mostly due to the fact that my summer camp is in full swing, so I just haven't had time to get on the computer! Days are spent 100% with the kids (no lunch or recesses by myself anymore!) and after camp is when I plan, prep, and rest! Camp has been running for a week and 2 days, and so far, I'm having a wonderful time. It's been all I was hoping for. I can't wait to write more about it, but for today, I am just dying to share a project!


This is the first project I do for the week with my camp groups. The week one projects were just as fantastic, but my camera was dead so I missed getting photos. I found the idea here, and even though it was done by high school students, I knew it would adapt well for my art camp kids (grades 3-8!)

Students started by making a collage with the "color story" of their choice onto a piece of foam core. It's really interesting to watch them choose colors - some have trouble going off the grid, but I try to keep reminding them that it's a color story, it doesn't have to be ALL one color (so if they chose orange, they can use yellows and reds - but in the end, the overall message should be orange.)

The next day, they do basic one point perspective drawings using a variety of shapes, onto a separate paper.  The shapes are colored in with gold Sharpie, and the lines are colored in using colors that match their color story.

I think they're just beeeauuutiful!!


Monday, June 24, 2013

Trees for Earth Day

This is so late, but I have some more projects to share that are even later!

For Earth Day, my first graders did trees on blooming trees. They used marker to draw the tree, then scraps of old tissue paper and manuals that were going to be recycled to make the leaves. When they were finished, they added in flowers and other details. Very simple to do, and so cute!


Thursday, January 31, 2013

Heart collages - grade 1/2


This is a project that was born out of desperation - we had some incredibly cold mornings last week, and on Wednesday, my usually reliable diesel car decided not to start. I was able to call a colleague for a ride, but didn't end up getting to work until 15 minutes before the bell (much later than I usually arrive!)

When I got to work, I desperately scrambled to find something for my 1st graders to do. I finally decided to slice up some tissue paper and dictionary pages, and have them do heart collages! By the end of the 40 minute period, the collages were so beautiful that I decided to extend the project another week. The next time I saw them, we glued the collages to colored paper, and students used a variety of colored Sharpies and metallic Sharpies to draw lines and shapes in the background.

I'm so happy with how these turned out! They look so beautiful all together.


Some students balled up the tissue, and I love the effect it gave - it almost looks like roses.


Sunday, January 20, 2013

Winter snow homes - grade 1/2

These past few weeks, we've gotten LOTS of snow, which is clearly now at the forefront of most kids minds. I wanted to do an art project with my grade 1/2's that was wintery and snow related. I found this adorable lesson online, which I decided to give a try. This was a really good project for the basic skills - cutting, gluing, and painting. The neatest part was seeing how they measured the triangle roofs relative to the shape of the house - they all had their own strategy to make the triangles "fit" to the roofs. I really love how these turned out! They're beautiful, and perfect for the season.


These took 2 classes of 40 minutes to make. Super cute!!


Saturday, November 26, 2011

Non-objective art (grade 2/3)

This is a lesson that I did over 2 weeks with a grade 2/3 class. From the get-go, this has been one of my favorite projects.
                              
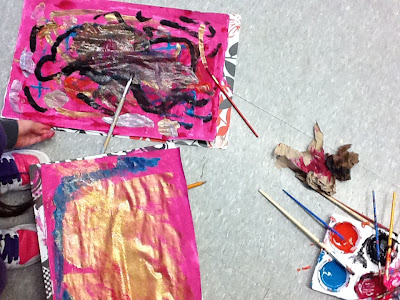
I found the idea here. Students were given a sheet of 11x17 paper, that I had pre-drawn rows of squares onto. We discussed what non-objectional painting was – painting the paper using no recognizable images. No hearts, no sunshines, no trees, just lines, circles, and swirls. They flipped the paper over, and began painting. They used the entire hour long period to fill the paper with pinks, purples, blues, metallics, and glitter glue. 


 The picture above is currently the backround on my iPad. I just love it!

During the second class, students were given a regular sheet of drawing paper, and began cutting out their squares (we realized early that we’d have lots of leftover, so they started by cutting off a big piece of their painting, which we will use in another art project.)


 After they had cut out their squares, they arranged them into an appealing pattern on their paper. Then, they glued them, overlapping slightly, trying to leave NO white behind!
When they were done, we mounted them on black cardstock.


Aren’t they just beautiful!? It’s hard to believe this was done by 7 and 8 year olds.

Friday, November 25, 2011

Onomatopoeia art


It's been a while since I've posted a project - it always seems to be that I'll have a couple of weeks where we are "in process", then suddenly I'll have several finished projects to share (such as I do now.)

Inspired by a picture I saw on pinterest, I decided to do a lesson on onomatopoeias with my grade 5 and 6 art classes.

We started by talking about what onomatopoeia are, then we spend some time looking at some comic books, and some artwork by Litchenstein, Next, I showed the class a short video from the original Batman movie, and had them call out the onomatopoeias that flashed on the screen.

I had tracers available for students if they weren’t confident doing the lettering, but others just went off on their own and they all turned out so great.

 
When they were done the lettering, they coloured it in (using ONE color, unless they could make a VERY special case as to why they needed more) then cut it out carefully.


The next step was to collage an entire sheet of paper using old dictionary pages. Next, they traced a shape, such as an explosion or a cloud, on the back, and cut it out. After gluing their shape onto a new sheet of coloured paper, they cut it out, leaving a border. Then they glued THAT onto ANOTHER sheet of paper, then glued their word on top.


Look at how great they look!


This is a project that used a TON of paper, and there were scraps everywhere, but the results were so great that it was definitely worth it!
This took two 1 hour periods.
Related Posts Plugin for WordPress, Blogger...