Showing posts with label Halloween. Show all posts

Thursday, October 31, 2013

This years Halloween costume!

I am pretty pleased with my Halloween costume this year, and now that my students have all seen it, I can share it with the blog world!

This year, I decided to go as a wacky waving inflatable arm flailing tube man (those tubes you see in parking lots of car dealerships and grand openings.) I saw this gif way back in June, and knew I had to try and recreate it for Halloween. I didn't really know that I would be 6 months pregnant by the time Halloween rolled around, but it was still do-able!

Here's a video of me in my costume from last night:


There were no instructions to be found online, so I just kind of guessed about how to do it. It was a lot of work to make, but I've always been willing to do the work for a good costume (see Lego Man!)

The materials I used for this costume were:

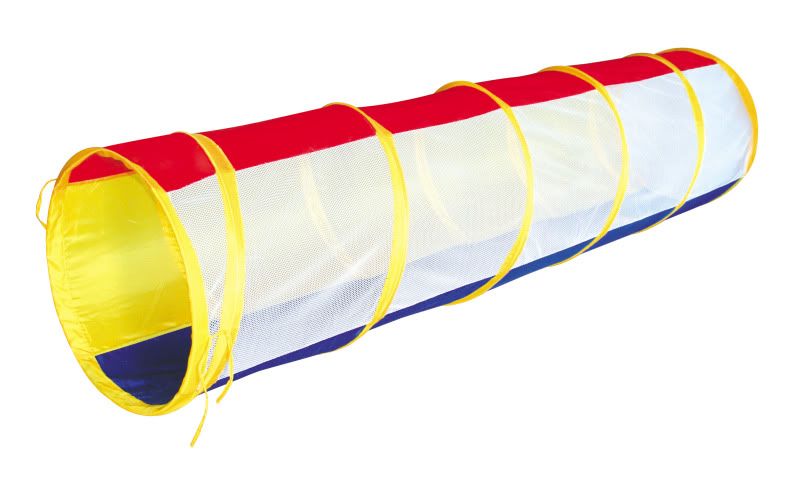
  • One of those tubes kids use in the backyard (tent tube?)
  • 2 meters of stretchy jersey fabric (yellow)
  • black and white felt (eyes)
  • black nylons (mouth)
  • two pieces of velcro (to velcro the mouth closed)
To start, I sewed a long yellow tube which I fit over the tent tube. Instead of stitching it up at the top, I just tied it in a knot from the inside, which sealed it perfectly. Then, I cut holes where my arms would naturally fit, and sewed two long skinny tubes on as arm holes (I made them much, much longer than my real arms - about three times the length!)

For the eyes, I just sewed directly onto the tube where it seemed right (I had my husband help from the outside to pick the right spot.)

I cut out the mouth shape and sewed it right onto the tube, then cut a straight line at the top of the mouth from the inside. Out of this slit, I can see a bit and also poke my head out. I attached two pieces of velcro so that I can keep the mouth opening closed.

It's such a great costume. It's crazy impractical (I can only handle about 15 minutes at at time before I need a break) but it makes me laugh so much that it's totally worth the irritation of taking it off and putting it on all day. At the end of the day, my students laughed a lot, which is basically always my goal. 

Tuesday, October 22, 2013

Day of the dead skulls - grade 6


This is a repeat of a project I posted about two years ago. It's one of my all time favorite projects, because it's so visually stimulating, and kids love it!

I use the same process every time I do this project - students are given a blank skull template (because drawing a skull isn't the objective here - it's actually to create a symmetrical piece of art based on a cultural celebration.) We talk about Dia de los Muertos, and look at images of skulls from various celebrations. Then, students draw designs in the skull using a pencil, paying attention to symmetry.

When they're happy with their designs, they trace their lines in Sharpie, and use watercolor paint to paint them in. Once they're done, they cut out their skull and glue it to a piece of scrapbooking paper. Lastly, they use jewels and sparkles to add finishing touches to their skulls.


Students learn a lot about balance in this project - there is really a perfect balance that needs to be achieved between black, white, and color, and its interesting to see how they pick up on this while they're working. The package of scrapbooking paper that I bought had some pieces that were grey on black instead of white on black, and you could see when students held their skull up to those sheets that it didn't give the same kind of "look" as when they used a busy, patterned, black and white paper.


Students also picked up on the need for balance in their skull - keeping a good mix of white with their painted parts (it can be tempting to paint the whole thing, but the white adds so much!)


Since holiday related projects aren't for everyone, I always have an alternative option for students - in this case, a vase, which still lends itself to the symmetry and design, without being holiday related. All students were allowed to pick if they wanted to work with a skull or a vase.

 Look at this amazing vase one of my students came up with - it's stunning!


It's so beautiful that I feel inspired to do a whole project based around it. I love when that happens!

Thursday, October 3, 2013

Fall scarecrows - grades 2/3

It feels odd to be writing about a grade 2/3 project now that I'm at an intermediate school, but actually, this is a project a friend of mine did with a grade 2/3 class she supply taught for. I thought it was so great that I had to share!


Here's what she told me about the process:

"We used wax crayons with a watercolor wash on top for the sky. It was a grade 2/3 class, and the period was 80 minutes long. It could be a two day project as well. We did a group draw for the scarecrow. I didn't have enough permanent markers, otherwise I would have gotten them to outline their scarecrows before coloring with crayons. Instead, the black outline is crayon."


Aren't they absolutely adorable? Seeing this made me feel a little pang of sadness that I no longer teach elementary art. I really had fun with projects like this!

Thanks to Jules for sharing this!

Thursday, September 26, 2013

Grade six unity/collaborative candy


 This is the third collaborative art project that I have done with a class. The first time, I did collaborative crayons with my grade 5/6class. Next, I tried collaborative snakes with grades 4/5. I was so excited to try another one with my grade 6 art class. This time, however, instead I decided that we would study...candy! I made templates for lollipops and candy corn (templates are ESSENTIAL for collaborative art – the drawings must be the same size to maintain the look of unity.)


We used the same process as in the projects before. It took my students roughly two 50 minute periods to finish these. They look incredible running down the hallway!


In case you were curious about the display board - for my first project of the year, my class did the optical illusion collages I posted a couple of weeks back. They were the perfect project to start the year!

Sunday, October 28, 2012

Spooky silhouettes on hand dyed paper - grade 5/6


This is a project I did last year that has actually become one of my most popular projects on this blog. I figured I would do it again towards the end of the year, as I did last year, but then I had the idea of using the same technique but with spooky Halloween silhouettes.

I gave my students about 20 minutes in the computer lab, where they had to compile together their ideas for their silhouette. Once we got back to class, they drew their ideas onto black paper. The one rule here was that they could not trace what they found online - even if they found the perfect image ready to go, they still had to draw it, rather than tracing it.

We used the exact same technique as last time to dye the paper, which I outlined in my last post. The only difference is that this time, they added sparkles after chalk pastel, to look like twinkly stars in the sky. These don't show up too much in the pictures, but they look great in person! After about an hour and a half, the papers were dry enough to glue the silhouettes onto. Then we mounted them onto black paper, and they were done!

Let me know if you try this technique and if you have any luck with it. We love it over in my class!


Saturday, October 27, 2012

Dried glue value pumpkins - grade 5/6


Here's a project that I saw last year on A Faithful Attempt. I kept it in the back of my mind, to use during the Fall this year. Even though the example I had seen was done by 7th grade students, I was pretty sure it would work well with my grade 5/6's.

On day one, students drew their pumpkins very lightly using a pencil. Then, they used clear glue on black paper to trace their pencil lines. We put them aside, and let them dry for a day.

The following day, they used chalk pastels to color in the pumpkins, using different shades of orange, and black and white, to create value. They colored in the ground and sky, focusing on blending colors for interest. Finally, they used little dots of sparkles to make a starry sky. As always - very proud of their work!


I have a good little backlog of projects developing, including several more Halloween ones, so hopefully you'll be seeing some more posts from me this weekend!

Monday, October 31, 2011

The making of my Red Sox Lego Man Halloween Costume

This Halloween, I decided to be Red Sox Lego Man. Altogether the costume took about 8 hours, but it was in front of the TV, and really enjoyable. I made it all using bristol board, tape, poster board, velcro, and foam. It turned out very nicely! I am not going to bother with directions, as it seems pretty straightforward, but I can answer questions if there are any!


 Netting was put in the smile so that I could see out.


So happy with how it turned out!!
Related Posts Plugin for WordPress, Blogger...